

Why enable SSH Two-Factor Authentication on your server?
SSH Two-Factor Authentication add’s an additional layer of security to your server / network. If your anything like myself you probably have your network locked down from the outside world, with just an SSH server accessible from the internet. Once I’m authenticated and logged in to SSH i can then open a secure tunnel to browse the web at a remote location, or even forward a port and connect to another service, or PC via remote desktop.
I have always used a long but complex password I had memorised. It has always been at the back of my mind that I should try and increase the security on the server. given its the only way in to my network from the outside world. When I log in to Dropbox, My Windows Live, Google, Facebook and Steam account I have Two-Factor Authentication enabled, basically meaning I get a text message with a code I have to enter to log in. Even if someone was to finds out my password, that alone is useless without an authentication code which is constantly changing.
For my Windows Live and Google accounts i use Google Authenticator to generate a login code. Google Authentication is what we are going to add to our SSH Server as the second factor of authentication. For anyone who’s worried about Google Authenticator phoning home you have no need to, all the work is done on your SSH server and your mobile phone. Google Authenticator is an open source project you can read more about here.
In this tutorial i will explain how to enable Two-Factor Authentication with Google Authenticator on Ubuntu Server, this will also work fine on Ubuntu Desktop too. You will also need an Android, iPhone , Blackberryor Windows Mobile phone with a free authenticator app installed.
SSH Two-Factor Authentication Setup:
It’s likely you will already have OpenSSH installed, or know how to install it, however if you don’t simply type: sudo apt-get install openssh-server

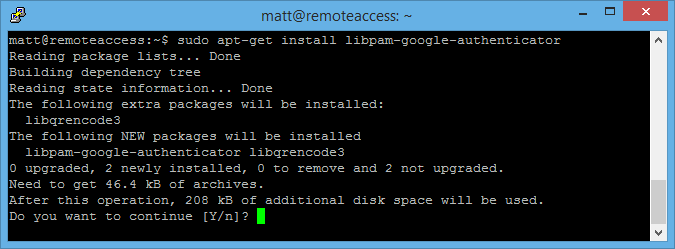
Presuming you now have OpenSSH installed we now need to install the Google PAM (pluggable authentication module) module, this is done by typing: sudo apt-get install libpam-google-authenticator

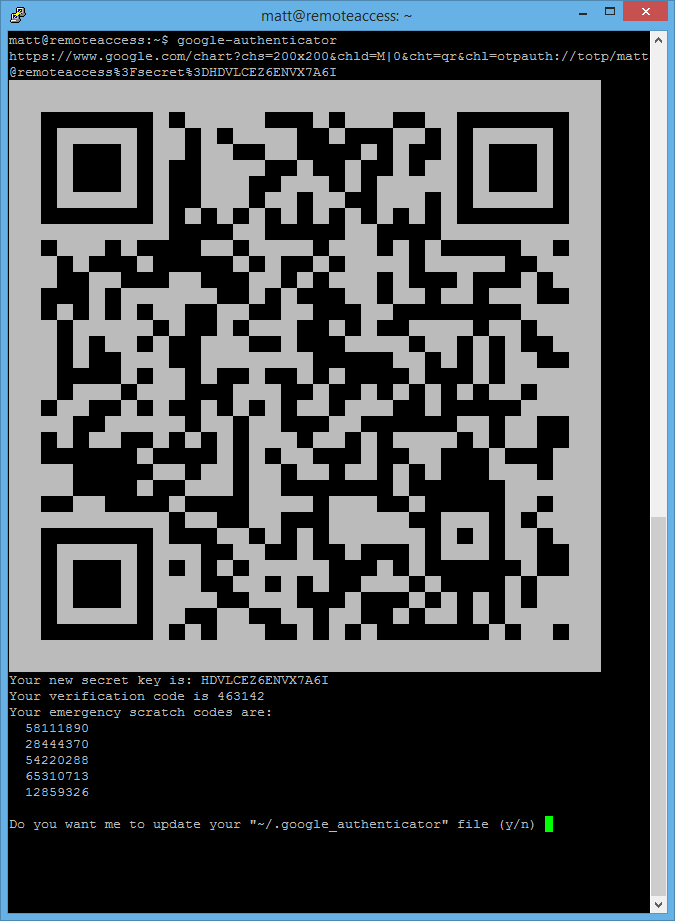
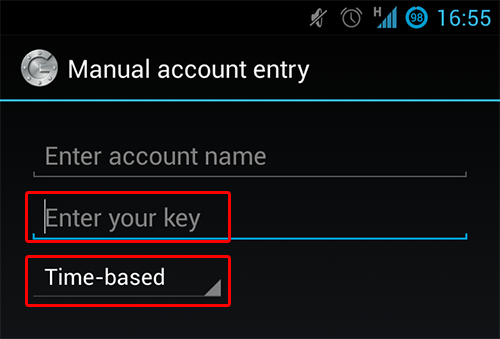
Now you have the Google Authenticator installed run the google-authenticator command to create a key for your user account

You will see a large barcode on screen, you might have to resize your terminal window so you can see it all. This barcode can be scanned with the Google Authenticator mobile app so your secret key is stored on your phone ready to be used. You also have a couple of emergency scratch codes, these are one time use codes you can use to authenticate your self in the event you do not have your phone on you. I keep mine encrypted in OnePassword, however you could write them down and keep them somewhere secure, save them in Dropbox or something like that.
Authenticator App Downloads and Setup:
- Google Authenticator Android
- Google Authenticator iOS
- Authenticator for Windows Phone
- Blackbarry – Visit this URL on your device to download
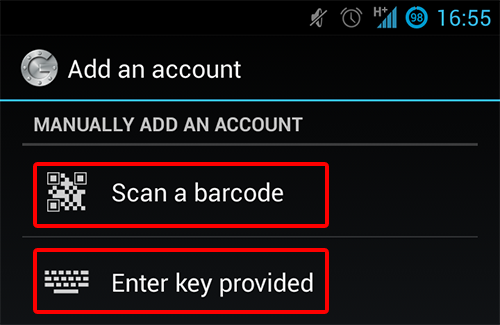
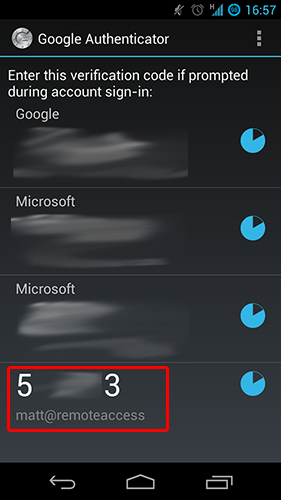
With the app on your device its now simply a case of getting your secret key on there so the Authenticator app can generate codes for you, on the Android version off the app you can either scan the on screen barcode, or enter the key manually.
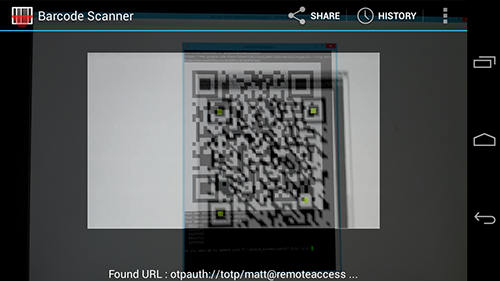
Scanning the barcode show on screen:
Entering the code manually:
Google Authenticator working and generating codes for your SSH login 🙂
Now the Authenticator app is setup say yes to “Do you want me to update your ~/.google)authenticator file”
Its up to you how you answer the next qestions, however i personally said Y, N, Y which i thought would give the best security.

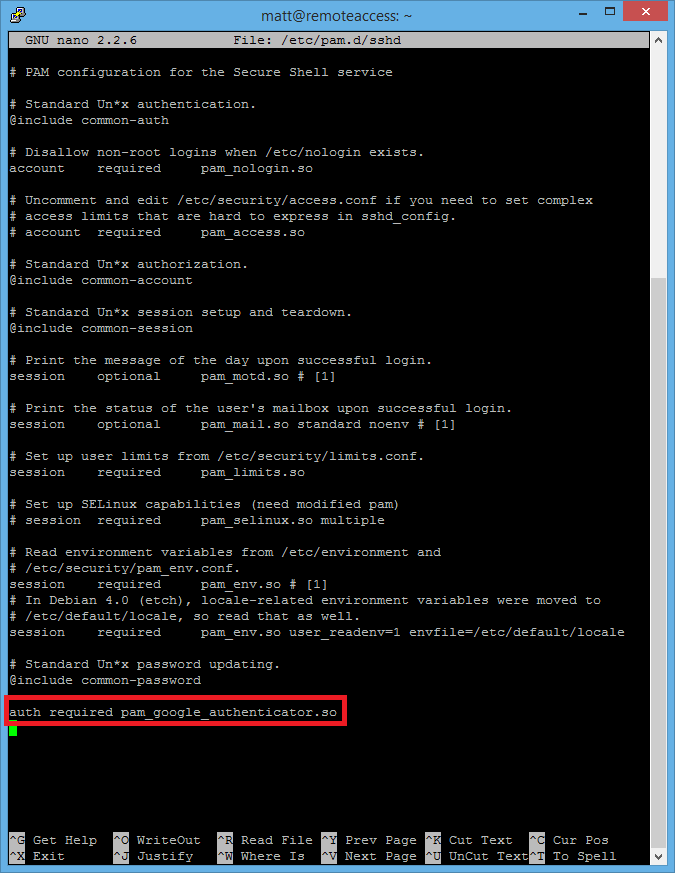
Now you need to enable Google Authenticator for SSH logins, to do this type sudo nano /etc/pam.d/sshd and add the following to the bottom of the file: auth required pam_google_authenticator.so
Note: To save the file in nano press CTRL, O and press enter.
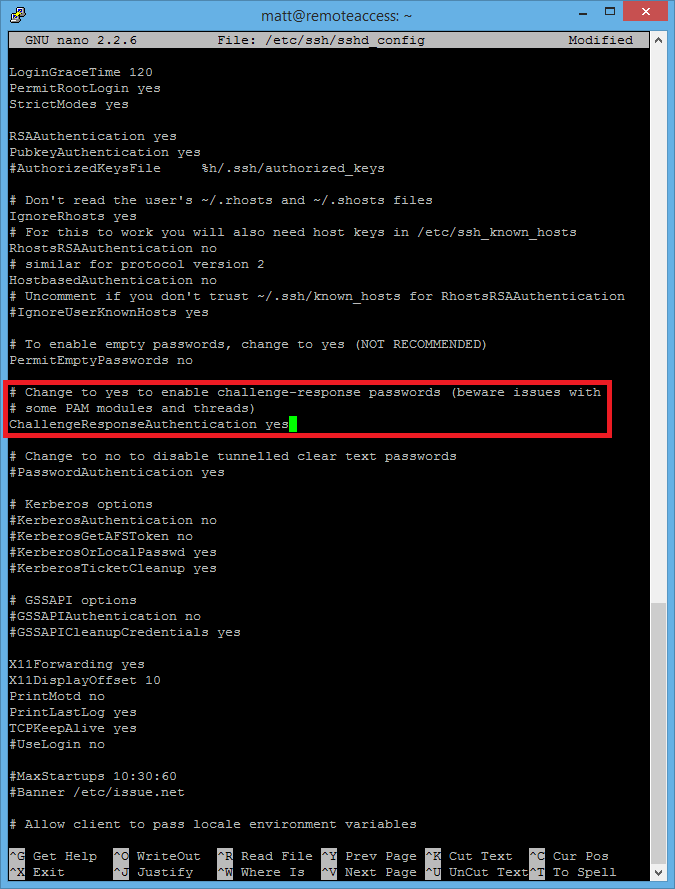
Next type sudo nano /etc/ssh/sshd_config and ensure the line “ChallengeResponseAuthentication yes” is set to yes, then save the file again with CTRL, O and press enter.
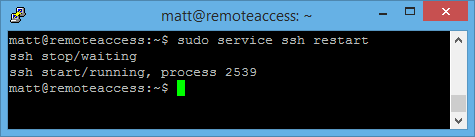
That should now be everything setup, type sudo service ssh restart to restart OpenSSH
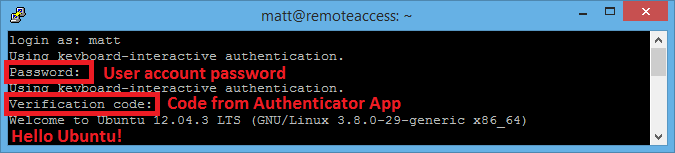
Now when you SSH in to your PC from a remote location even if someone did get your password (pretty hard unless your not using your own laptop) it would be usless as they would not have the code from the authenticator.
Hopefully the setup will have all gone smoothly for you
1 Comment
Pingback: 在PAM中使用google authentication | shell's home