

Unlocking The Asus Transformer Prime TF201 on Jellybean 4.1.1
This tutorial will show you how to unlock the bootloader on the Asus Transformer Prime TF201 Tablet, running Android 4.1.1 jellybean, along with backing up your blobs and enabling nvflash. You can just unlock the bootloader and happily go about flashing roms, however if you brick your tablet you have no way to then recover.
Now that the AndroidRoot team have given us the tools required to gain access to our blobs and nvflash we would be silly not to back them up at the same time. If the worst did happen and you brick your Transformer Prime TF201 at a later date, you can then recvover it and are not left with an expensive paper weight.
The information in this tutorial is based on the excellent work by the AndroidRoot team over at: https://www.androidroot.mobi/pages/guides/tegra3-guide-nvflash-jellybean/ I have simply covered the whole process from the initial unlocking, to backing up our blobs and finally gaining nvflash access.
In this tutorial i use Windows 8, however you will be able to follow this perfectly on Windows 7, and earlier versions of Windows too.
Unlocking the Transformer Prime TF201 on Jellybean 4.1.1
To get started we are going to unlock the Transformer Prime TF201’s boot loader, this will allow us to flash custom roms and recovery images, so lets get started.
- Download the UnLock Device App V6, unzip this and then copy this to your Transformer Prime TF201 internal memory.
- Install the APK like you would any other app.
- Load theUnlock Device App, and agree to the terms and conditions
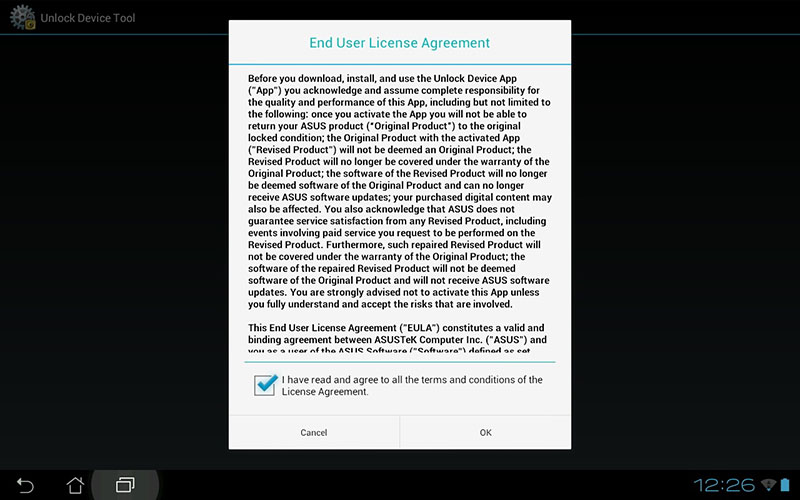
This is where you could either be happily on your way, or waiting for the Asus servers to respond for hours, weeks or even months going by what some people have said on the XDA forums. I kept getting a network connection error trying to unlock my prime, my network connection was fine. Apparently this is an extremely common, and annoying problem. After a lot of messing about I gave up, came back to my prime later and managed to unlock first time.
You will be asked to verify your Google account password to unlock, if you have two factor authentication enabled you will have to generate an individual app password on the Google accounts settings website to enter here. With two factor authentication your normal Google account password will not work here.
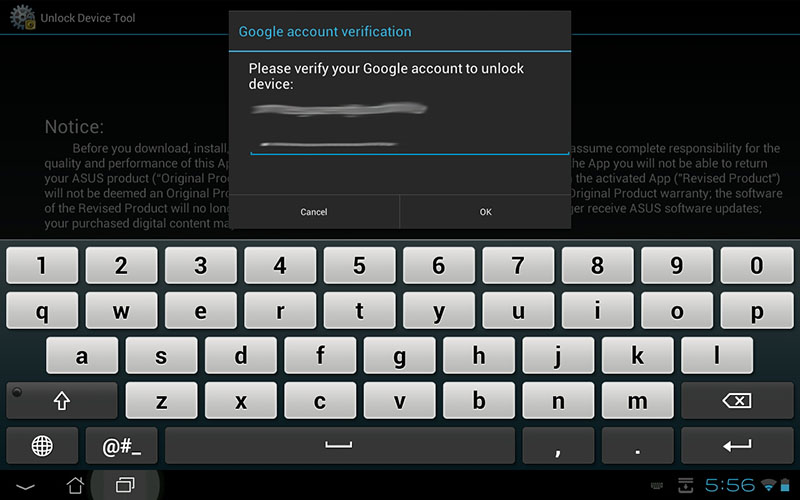
All been well your device will re boot and unlock its self. From now on when your Transformer Prime TF201 boot’s you should see a message in the top left of the screen stating “This device is unlocked”.
Backing up your Blobs and Enabling Nvflash access:
Now your Asus Transformer Prime is unlocked we have enough access to backup your blobs and enable access to nvflash, this essentially will allow you to recover your Transformer Prime if something really bad goes wrong at a later date, essentially making your Tablet un brickable.
You will need to download Fastboot, which is part of the Android SDK, i have provided it as a download here to save you messing about installing the SDK
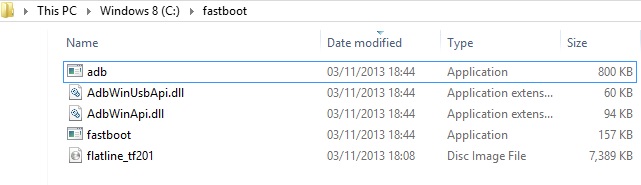
To keep things simple unzip and copy the contents of the fastboot.zip to C:\fastboot
Next download Flatline for the Transformer Prime (hosted on androidroot.mobi)
This also must be unzipped to the C:\fastboot folder too.
The contents of C:\fastboot should now look like this:
Now switch your Transformer Prime off, hold the volume key down on the left hand side, and press the power button. You should now see the boot menu.
Using the volume down button move along to the USB icon, then press volume up, you should then end up in fastboot.
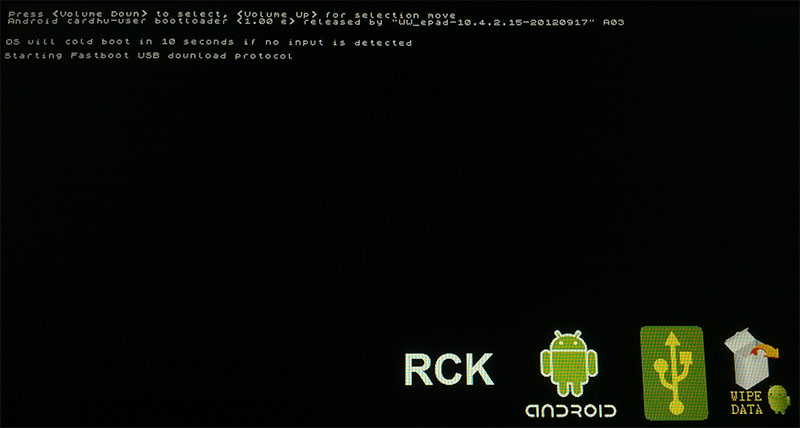
Connect the Transformer Primes USB cable to your PC, it might be an idea to check in device manager to ensure you do not need to install any drivers:
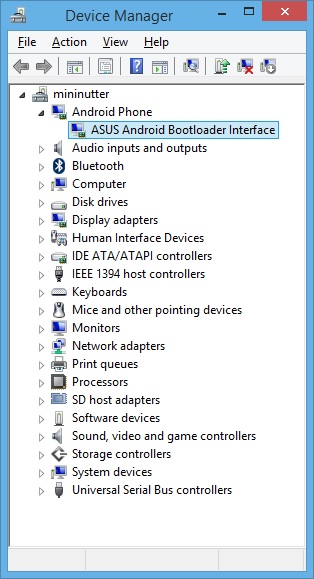
If you do need to install some drivers the Universal Naked Driver 0.72 worked fine on Windows 8.1 for me. I did however have to re start Windows in test mode to allow the unsigned drivers to be installed.
Download Universal Naked Driver 0.72
Presuming you have drivers installed and are now ready to go Open up a Command Prompt window in C:\fastboot, to get to C:\fastboot you can type “cd C:\fastboot” without the quotes and press enter.
Type fastboot -i 0x0b05 flash recovery flatline_tf201.img
The Flatline recovery image should be flashed to your Transformer Prime:
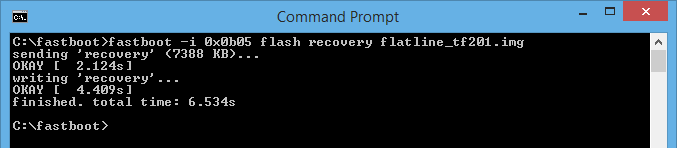
A blue bar will also be shown on the Transformer Primes screen indicated that flashing succeeded.
After the flash process has completed you will need to reboot your Transformer Prime TF201 into recovery mode. It is important that you reboot completely rather than directly enter recovery. If you don’t there is a risk that this process could fail.
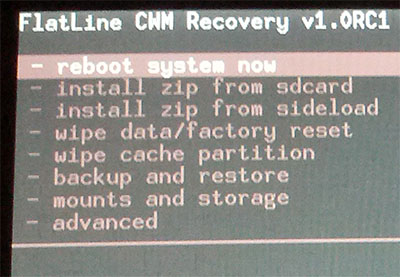
This time powering the Transformer Prime TF201 on with the volume button held down select “RCK” on the boot menu to launch the Flatline recovery:
When in the recovery select advanced:
Then select wheelie:
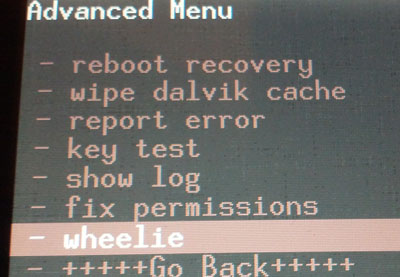
Note: this process could brick your device, so remember you are doing so at your own risk, i will not buy you a new tablet if you brick it.
So agree that you could harm your device:
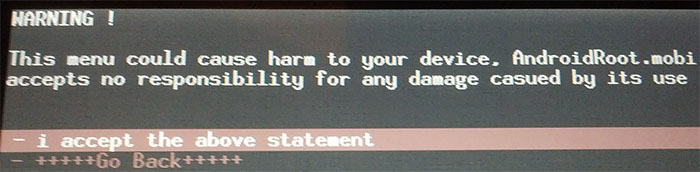
Finally click on Step 1: Flash AndroidRoot BL, this will flash the AndroidRoot custom boot loader:
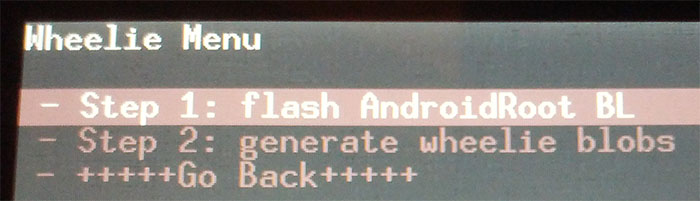
The Transformer Prime TF201 will power off. Power theTransformer Prime TF201 back on and allow it to boot normally into Android. Once the device has fully booted please turn the Transformer Prime off, then reboot the device back into recovery mode.
Once your prime has booted into recovery again, you need to select “Step 2: Generate wheelie blobs” from the wheelie menu in the advanced options:
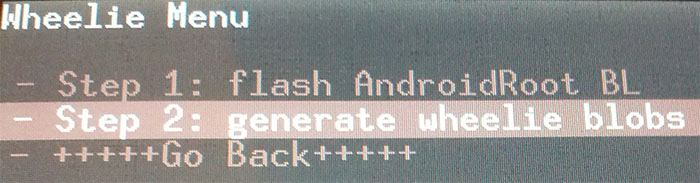
This will generate your nvflash blobs and if a wifi connection is able to be initialised, it will upload the blobs for safe keeping to the AndroidRoot webserver (there is nothing confidential about your encrypted nvflash blobs). After blob generation is complete, please follow the on the screen prompt to retrieve your blobs from the /data partition.
With the Command Prompt window still open in C:\fastboot type adb pull /data/media/AndroidRoot
You should have the following 7 files download from your Transformer Prime:
- recovery.bct
- create.bct
- bootloader.ebt
- blob.log
- blob.bin
- pt_restore.log
- pt_patch.log
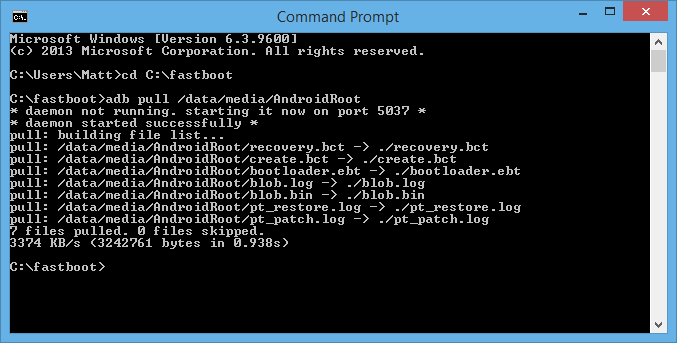
It is important you back all these files up in multiple locations, do not loose them. If you brick your prime it will be your only way to recover.
Using Nvflash:
We now have all we need to use NvFlash
To use Nvflash reboot your Transformer Prime into APX mode, this is done by holding down the volume up key when powering the Transformer Prime on. If successful the screen should remain blank and be detected over USB by your computer as an NVIDIA APX mode device.
If you have Windows 8.1 you will likely need to go to device manager and install the Universal Naked Driver 0.72 for the NVIDIA APX mode device.
- Download Nvflash
- Unzip nvflash to C:\nvflash
- Copy the 7 files we backed up earlier in to C:\nvflash also:
- recovery.bct
- create.bct
- bootloader.ebt
- blob.log
- blob.bin
- pt_restore.log
- pt_patch.log
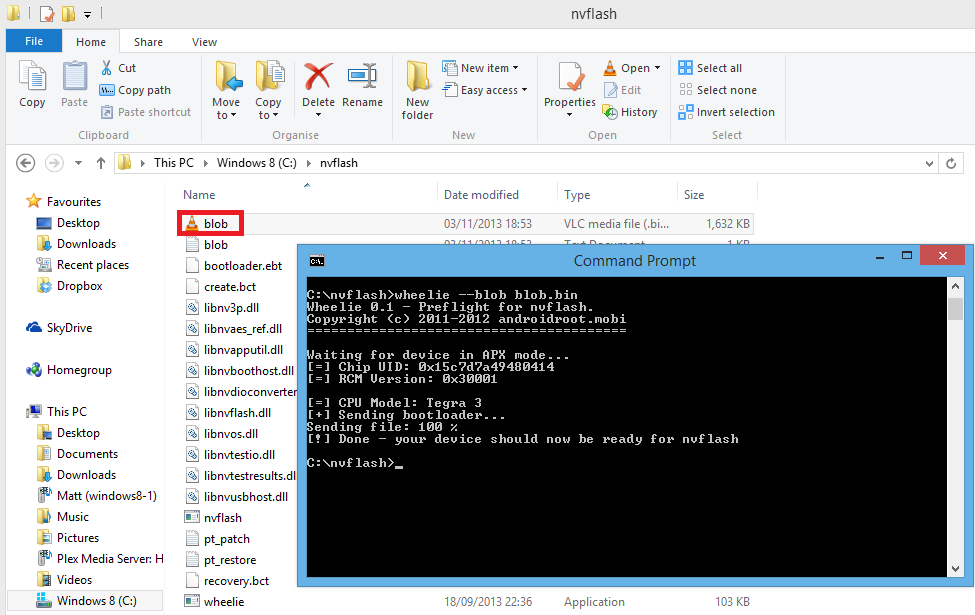
Now if we open a Command Prompt in C:\nvflash this will allow us to boot our Transformer Prime in to Nvflash by typing:
[syntax type=”html|php|js|css”]wheelie –blob blob.bin[/syntax]
If successful the Transformer Prime TF201 will boot into nvflash mode and the bootloader screen will appear on the device.
The screenshot below shows the contents of C:\nvflash and the output in the command prompt from the boot process:
We now have three more important backups to make, type the following commands to backup your bricksafe.img, factory-config.img and unlock-token.img
[syntax type=”html|php|js|css”]
nvflash –resume –rawdeviceread 0 2944 bricksafe.img
nvflash –resume –read 14 factory-config.img
nvflash –resume –read 7 unlock-token.img
[/syntax]
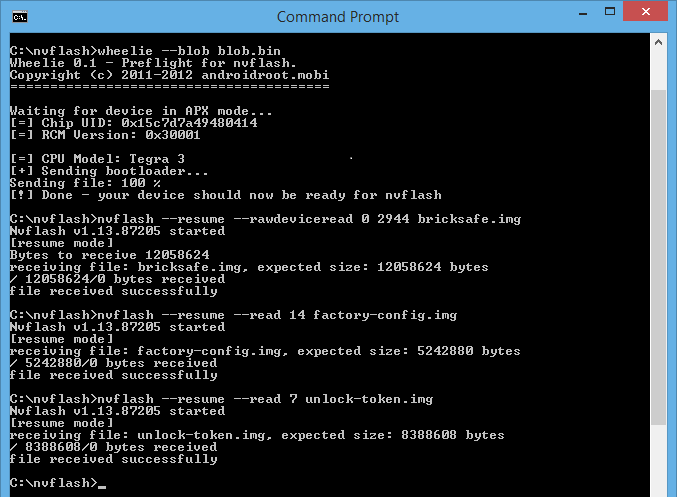
Store these backup safely along with your blob files.
That it, you have now unlocked your Transformer Prime TF201, and created the relevant backups to recover your tablet with Nvflash in the event you accidentally brick it.
Please note the tools and a lot of the information in this tutorial has been provided by the Android Root website https://www.androidroot.mobi/pages/guides/tegra3-guide-nvflash-jellybean/
I have simply tried to document everything, including the initial unlocking of the Transformer Prime from start to finish, with screenshots and detail to allow a less experienced user to complete the process with confidence. Nothing here would be possible without the hard work of the Android Root team.
Hopefully my experience of unlocking and preparing my Transformer Prime TF201 for custom roms has given you the confidence to do this with your own tablet too. Sadly Asus have not issued an official update for the Transformer Prime TF201 since my guide on How to Root Transformer Prime TF201 After Jellybean 4.1.1 Update, which i wrote well over a year ago now. I think its safe to say if we want newer versions of Android custom roms are now a must. Now we can backup our blobs and access nvFlash i thought this was a good time to finally unlock my prime, given the only benefit to keeping it locked was OTA updates from ASUS.
Asus Transformer Prime TF201 Unbricking:
This is something that gets asked a lot in the comments, i cant personally share my experience with unbricking the Prime TF201 as i have never bricked mine, and dont intend to try and do so. However i did contact someone on the Android Root Team as to why no information was available on recovering from a brick, basically depending on the brick they could be several different things that need to be done, so the Android Root team recommend you contact them directly for assistance with unbrcking.
To quote part of the email i got:
[blockquote source=”Android Root Team”]
We purposely left out the advanced guides as we feel it’s just not possible to write something generic. In most cases, people tend to mess things up more when following random unbrick guides.
We prefer people stopping by the irc channel on freenode.net #asus-transformer and get hands-on help to avoid any unnecessary grievance.[/blockquote]
So with that in mind install an IRC client (mIRC works well in Windows) then connect to freenode.net and join #asus-transformer.
My only concern is the Android Root Team might not be around forever… so if someone ever does go through the unbricking process i would personally love to see a blog about this.
